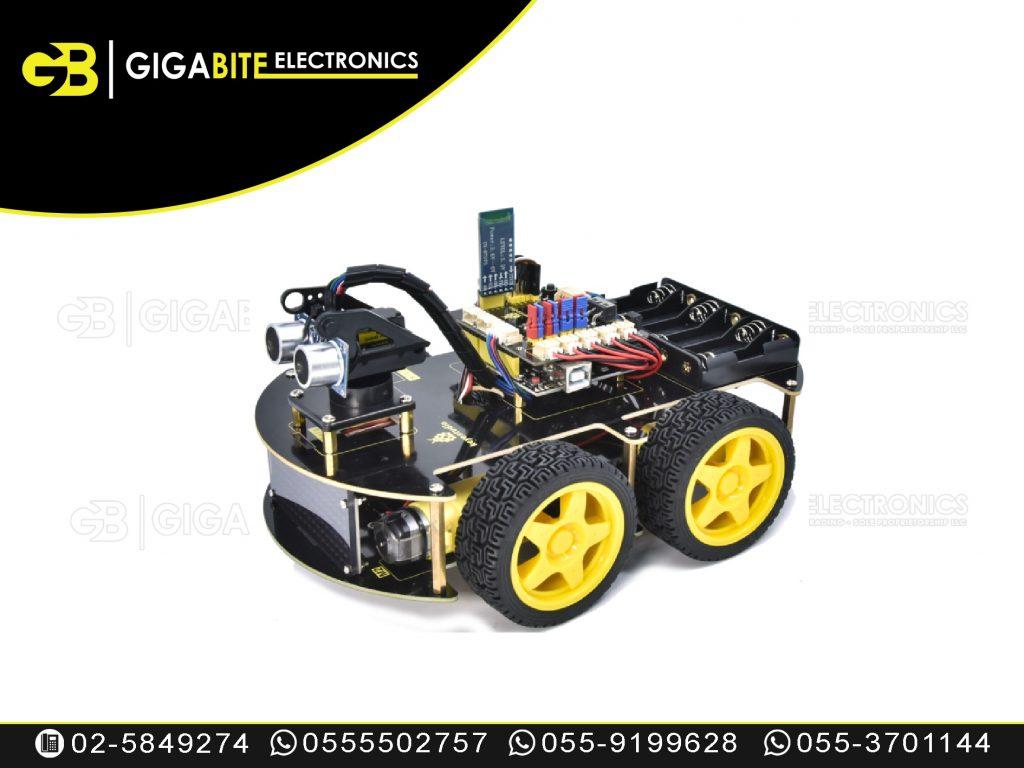
Programming a 4 wheel robot involves both hardware (components to build the robot) and software (to control it). Here’s a breakdown of what you need and how to go about it.
🧩 Components Required for programming a 4 wheel robot
1. Chassis & Motors
- 4-wheel chassis (metal or plastic frame with mounting points)
- 4 DC motors (or geared motors for torque)
- Motor brackets (to mount motors to chassis)
- Wheels (match motor shafts)
2. Motor Driver
- L298N, L9110, or TB6612FNG motor driver modules
- Needed to control motor direction and speed via microcontroller
3. Microcontroller
- Arduino Uno / Mega / Nano
- Other options: ESP32 (for Wi-Fi/Bluetooth), Raspberry Pi (if using more advanced logic or image processing)
4. Power Supply
- Battery pack (Li-ion, LiPo, or AA battery pack)
- Voltage regulator (if needed to step down voltage)
- Switch (to easily power on/off the robot)
5. Wires & Connectors
- Jumper wires
- Soldered connections or screw terminals
6. Optional Sensors
- Ultrasonic sensors (for obstacle avoidance)
- IR sensors (for line-following)
- Encoders (to measure wheel rotations)
- IMU/Gyroscope (for balance/navigation)
- Camera (if using computer vision on Raspberry Pi)
💻 Basic Programming (with Arduino) for programming a 4 wheel robot
Here’s a simple example using an Arduino Uno + L298N motor driver to control the robot manually.
Step 1: Wiring Overview
- Connect each motor to the L298N outputs
- Connect IN1, IN2, IN3, IN4 of L298N to Arduino digital pins
- Connect ENA and ENB to Arduino PWM pins (for speed control)
- Connect power and ground properly
| Arduino Pin | L298N Pin |
|---|---|
| 5 | IN1 |
| 6 | IN2 |
| 9 | IN3 |
| 10 | IN4 |
| 3 (PWM) | ENA |
| 11 (PWM) | ENB |
Step 2: Sample Code
// Motor A pins
int IN1 = 5;
int IN2 = 6;
int ENA = 3;

// Motor B pins
int IN3 = 9;
int IN4 = 10;
int ENB = 11;

void setup() {
  // Set all the motor control pins to outputs
  pinMode(IN1, OUTPUT);
  pinMode(IN2, OUTPUT);
  pinMode(ENA, OUTPUT);
  pinMode(IN3, OUTPUT);
  pinMode(IN4, OUTPUT);
  pinMode(ENB, OUTPUT);
}

void loop() {
  moveForward();
  delay(2000);
  moveBackward();
  delay(2000);
  stopRobot();
  delay(1000);
}

void moveForward() {
  digitalWrite(IN1, HIGH);
  digitalWrite(IN2, LOW);
  analogWrite(ENA, 150); // Speed between 0-255

  digitalWrite(IN3, HIGH);
  digitalWrite(IN4, LOW);
  analogWrite(ENB, 150);
}

void moveBackward() {
  digitalWrite(IN1, LOW);
  digitalWrite(IN2, HIGH);
  analogWrite(ENA, 150);

  digitalWrite(IN3, LOW);
  digitalWrite(IN4, HIGH);
  analogWrite(ENB, 150);
}

void stopRobot() {
  digitalWrite(ENA, LOW);
  digitalWrite(ENB, LOW);
}
🧠 Advanced Features (Optional)
You can add the following for more intelligence:
| Feature | Component Needed | Use Case |
|---|---|---|
| Obstacle avoidance | Ultrasonic sensor (HC-SR04) | Navigate without collisions |
| Line following | IR sensors | Stay on a marked path |
| Remote control | Bluetooth module (HC-05), WiFi (ESP32) | Use phone app or PC to control |
| Autonomous movement | Arduino + logic | Predefined path, GPS-based nav |
| Computer Vision | Raspberry Pi + Camera | Detect objects, colors, shapes |
🧰 Tools You May Need for programming a 4 wheel robot
- Soldering kit
- Multimeter (to check connections)
- Screwdrivers, pliers
- Breadboard (for testing before final wiring)
✅ Final Tips for programming a programming a 4 wheel robot
- Use a separate power supply for the motors and microcontroller if your robot resets or behaves erratically (due to voltage drops).
- Use PWM (Pulse Width Modulation) for speed control.
- Secure all components properly; loose wires often cause errors.
- Always test one motor at a time when troubleshooting.
Would you like a specific robot design (e.g., Bluetooth controlled, line-following, or obstacle-avoiding)? I can help you build that step-by-step.